

Off-Grid Pre-fabricated 2V Dome Build Guide (Dome 1/3)
Below is a detailed guide on the dome home project we did near the Wisconsin Dells on Lake Petenwell. All the dome panels and risers were prefabbed at our workshop in Chicago and then we hauled everything on a trailer with my truck. We hammocked camped for several weeks on-site before we got the dome dried in and we did everything ourselves using mostly battery-powered tools and scaffolding. We probably spent 3-4 days on average each week from May to September to try to get the 1st dome done by winter. I wanted to share a detailed guide on how we did the project since there are some pretty neat concepts that I haven’t seen anywhere else on the internet so here it goes...
Everything from the foundation to the roof to the countertops was done by us except for the electric and septic. We are working with an inspector and everything so far is up to code but the location is still a bit rural so we could get away with a lot more than what most developed counties require. We eventually got electricity hooked up after the dome was dried-in and we had a contractor install a septic system shortly after that. Everything so far has cost us about $30K for materials and the hook-ups. I’m hoping to keep the cost of the other 2 domes around $30K as well since lumber prices have fallen since last year and we sort of know what we’re doing now.
The overall project consists of 3 geodesic domes that are connected together with short hallways. Each dome is about 400 sq ft and the entire structure will eventually come out to be 1200sq ft. Currently, the first dome is complete but still needs to be furnished and some trim needs to be added here and there. We already started prefabbing the panels for the next 2 domes at our shop. I wanted to share the project now before we get too busy on the final 2 domes. For the next 2 domes, we are ditching the miter cut method of creating the panels and I have designed a sheet metal bracket system that uses only 90-degree cuts which is already making for a much smoother and more accurate panel system.
Also, I lost an entire 120gb thumb drive that had tons of more footage of this build so I’m hoping to do a better job of documenting the final 2 domes this year so feel free to follow us for more updates. I’m going to try to release a Youtube video with a time-lapse of most of the panels going up here in the next few weeks but this 3 part photo album should be just as effective. Feel free to ask me any questions about the build I’ll try to answer anything I didn’t cover in this guide. TLDR: My buddy and I built an off-grid dome in the middle of the woods and we didn't murder one other and still have all our extremities intact.
Pt. 1 Making the Panels and Foundation:
2V Prefab Dome ( Pt. 1 Making the Panels & Foundation)
The structure for each dome is a 2V frequency but how our’s differs from a traditional dome is that ours has essentially 3 dome sizes all connected to each other using risers/ walls. I think traditional domes are pretty boring and outdated so it was very refreshing to run across the "Peoples Meeting Dome" by Kristoffer Tejlgaard & Benny Jepsen which was an inspiration for this dome. I was able to model up a 2V shape on Solidworks that allowed me to figure out all the miter cuts but I found that this calculator can give you the same results. https://acidome.com/lab/calc/#1/2_GoodKarma_2V_R2.5_beams_88.9x38.1. This calculator might be a bit confusing at first but there are a ton of youtube videos explaining how to use it. You can also download a 3D file from the site and modify it on most CAD software.
To make the panels you essentially need to rip both sides of a 2x4’s at an angle on a table saw so that both the OSB sheathing and drywall sit flush on the panels. From there you need to compound miter cut both ends on each strut and hope you’re doing it right. This was probably the most crucial, stressful, and difficult part of the build. A 2V dome has 2 types of triangles: an isosceles and an equilateral triangle. Since we have 3 different sizes we had to make 6X jibs for all the panels. A 2V dome also has 40 panels in total. After a couple of weeks at the shop, the panels were ready to go but we had to get the subfloor done before we could transport them over to the build site.
This entire project is coming out of my pocket so I needed to be able to do as much of this project myself so laying a concrete foundation would take too long, be too expensive, and could open the opportunity to become a complete failure. After getting a bunch of quotes for a helical piles installation ranging from 18K-50K I finally asked my inspector if we could use a product that most hardware stores carry and do it ourselves. We decided to with Pylex helical piles and install them at 1-2 locations on each beam. The center of the dome is a 12” dia. concrete pier that is below the frost line and will be static. All the ends of each “pie” beam will sit on the concrete pier. The helical piles will allow us to adjust the height if they end up sinking since they have a threaded saddle at the end of each pile. Each pile supports 5,000 lbs and we used about 16 of them while our calculation of the entire dome is only about 25,000 lbs at the very most. The best part about installing these piles is that I was able to use a cordless impact drill for all the piles and it took only about 1-2 mins to put them in the ground.
The base of the dome is a decagon which is 10 sides. We put together 10X triangular “pie” shaped pieces using 2x10s on-site and bottled them together to create the beams of the foundation. The second layer is the joist layer which will be spray-insulated from the bottom and from there the ¾” subfloor went in. Next is all the 3ft risers which will be countertop height and that’s where all the dome panels will sit. This gives us way more usable space near the walls.
2V PreFab Dome Build ( Pt. 2 Panel Assembly)
Pt. 2 Panel Assembly:
All the panels go together using a couple of clamps and we used liquid nails where the panels will butt up against each other. The overall height of the dome is about 14ft at its highest point from the floor so we only needed a double-decker scaffolding system and a ladder.
I think this entire phase of “raising the dome” took only about 5 days in total. It did get a little bit sketchy putting in the biggest panels that make up the top but we just took our time with that. I was surprised by how well the fit was between each panel but I think that the “risers” between the different size panels helped alleviate any tolerance stack when you compare it to a traditional half-sphere dome.
2V Prefab Dome (Pt. 3 Exterior and Interior)
Pt. 3 interior and exterior:
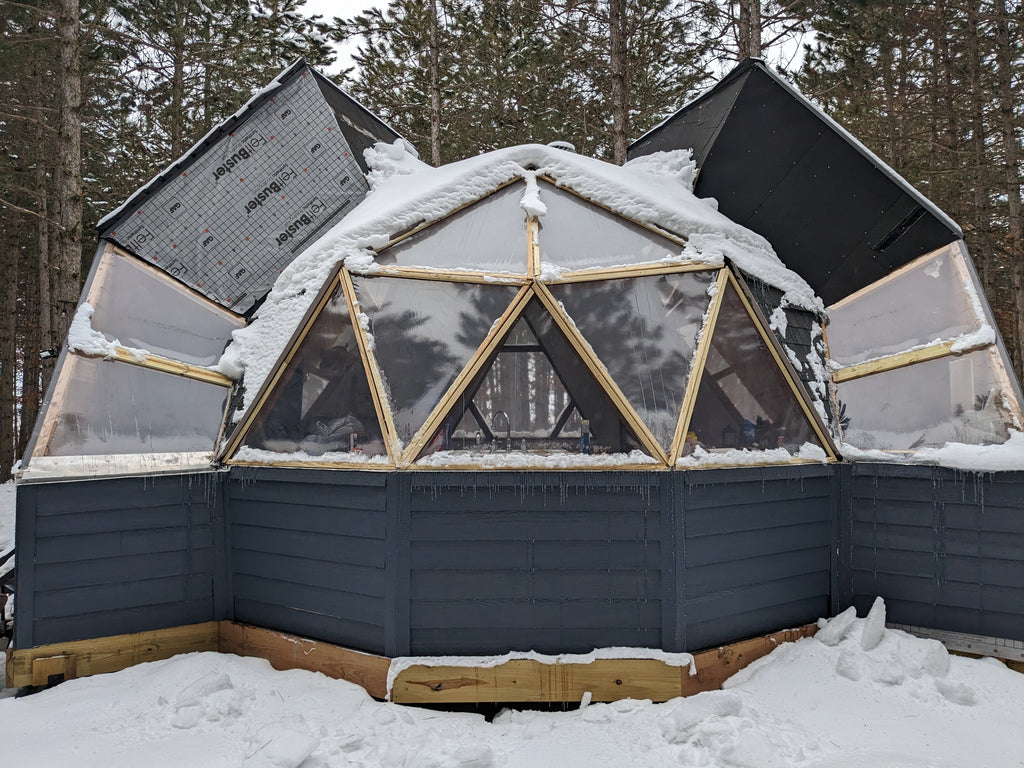
After all the panels were in place we used Zip Wall tape to tape all the seams between the OSB seething. From there we used Ice and Water barrier which has a sticky back. You want to start at the bottom and make your way up after each layer. you have to leave all the tips of the panels so that they are facing up in an “A” formation then do the panels that face down “V” after. This same process will be used for the shingles.
For the windows, we are using marine-grade vinyl until next spring when we eventually will replace them with acrylic windows. We stapled them in place and then used treated 1x2 strips to hold them in place and give them a nice finish.
I won’t really go too much into detail with the interior since most of it is not really dome specific. We tried to go with spray foam at first but that ended up being an expensive mess. We went with 1.5” thick EPS boards and then foamed them around the corners using Great Stuff. I went with cedar picket boards for all the interior cladding since it's only about $3 a board and has a nice smell and finish. I regret not adding a black backing to hide the gaps when the boards shrank. I also used the same boards to hide the gaps in the ceiling and it doubles as a trim board to add the LED strip lights.
We did the countertop back at the shop using pine strips and then stained and flood-coated them with Epoxy. The sink and tub were purchased at the local reclamation center. The pellet stove was one of the best investments of the entire project. It was around 1K and it only uses about 4$ worth of pellets a day if you are running it @70 degrees during the winter. I think we only have to add pellets to the hopper 2-3 times a day as opposed to babysitting a wood fire stove all day. Now I’m just waiting for the snow to thaw, I had to sled all my tools in on a kayak last week.
All that’s left are a few spots to fix some floor trim but overall I’m very happy with how smoothly everything went. It was scary at first to pull the trigger on the project but I feel like it’s defiantly worth all the blood sweat and beers that went into it. Thanks, for reading and stay tuned in 2023 when we build the next 2 domes!
You could keep up with all our projects on IG here
https://www.instagram.com/thunder_domes/?hl=en
Youtube channel where I’ll try to post the video soon
https://www.youtube.com/@thunderdomes9668/videos